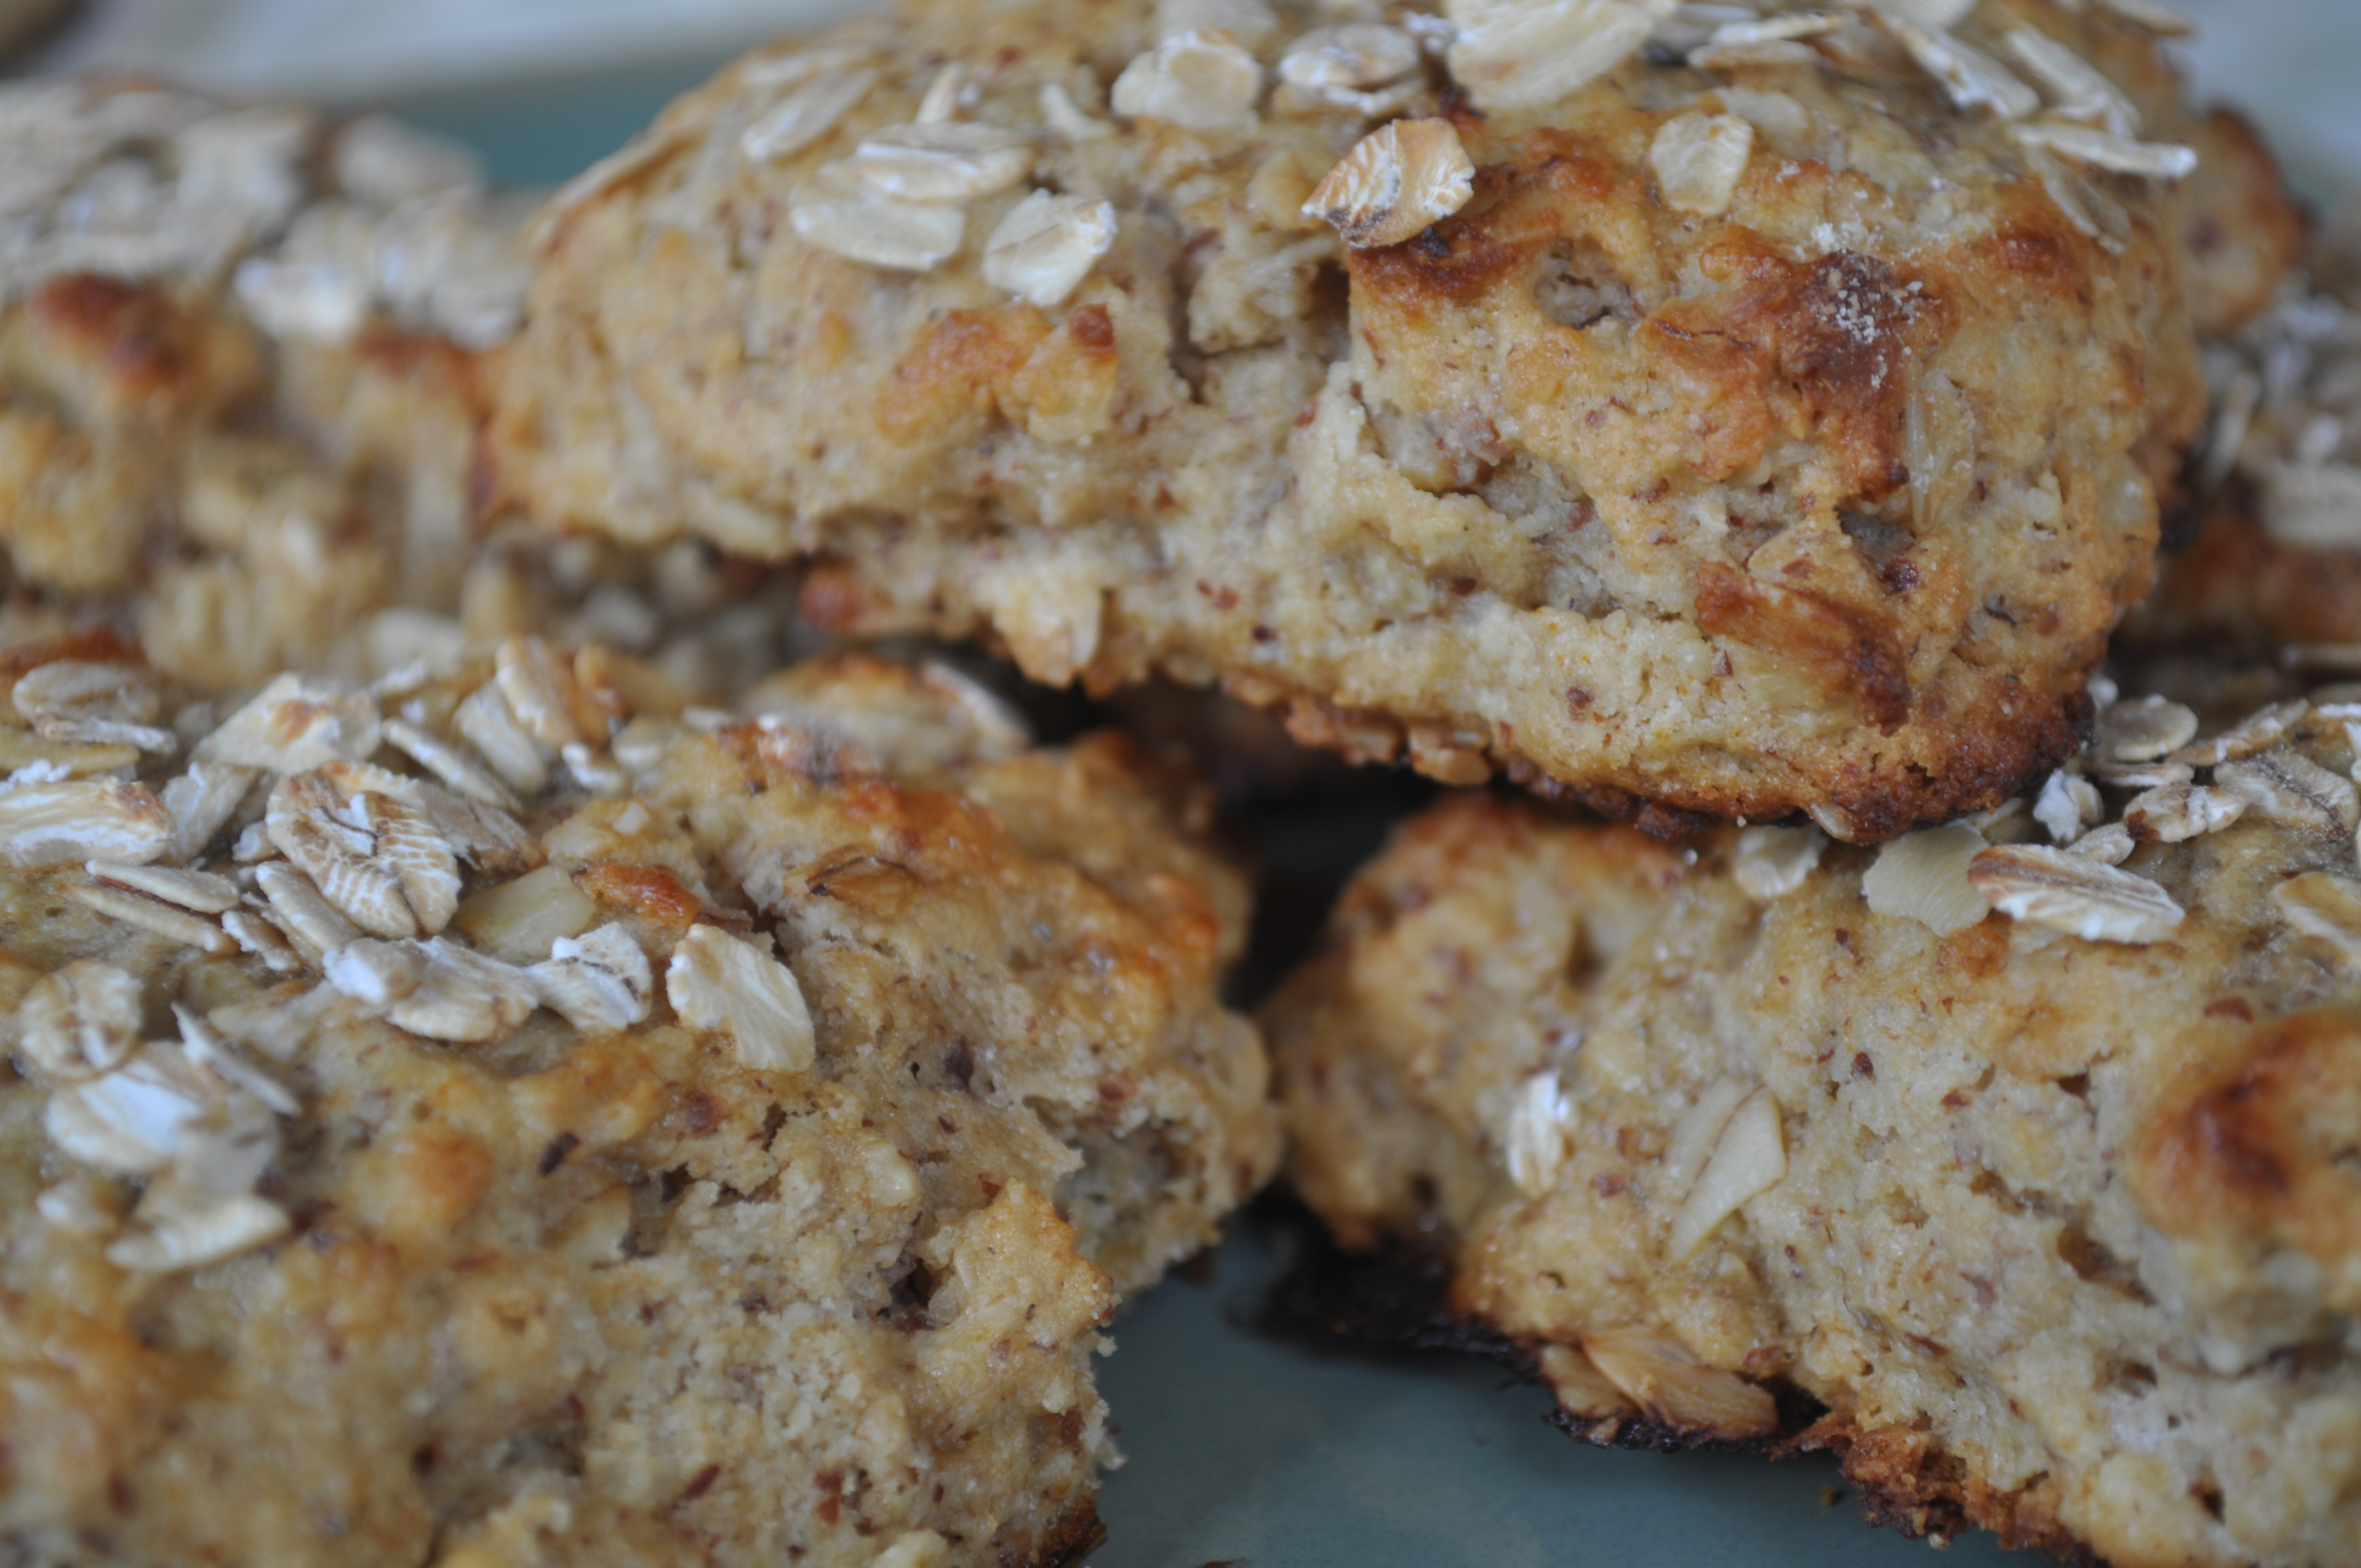
welcome to my culinary adventure


Leave a comment

Honey Almond Oat Scones (+ Blueberry Chia Seed Jam)

Heeeey lovers,

Image

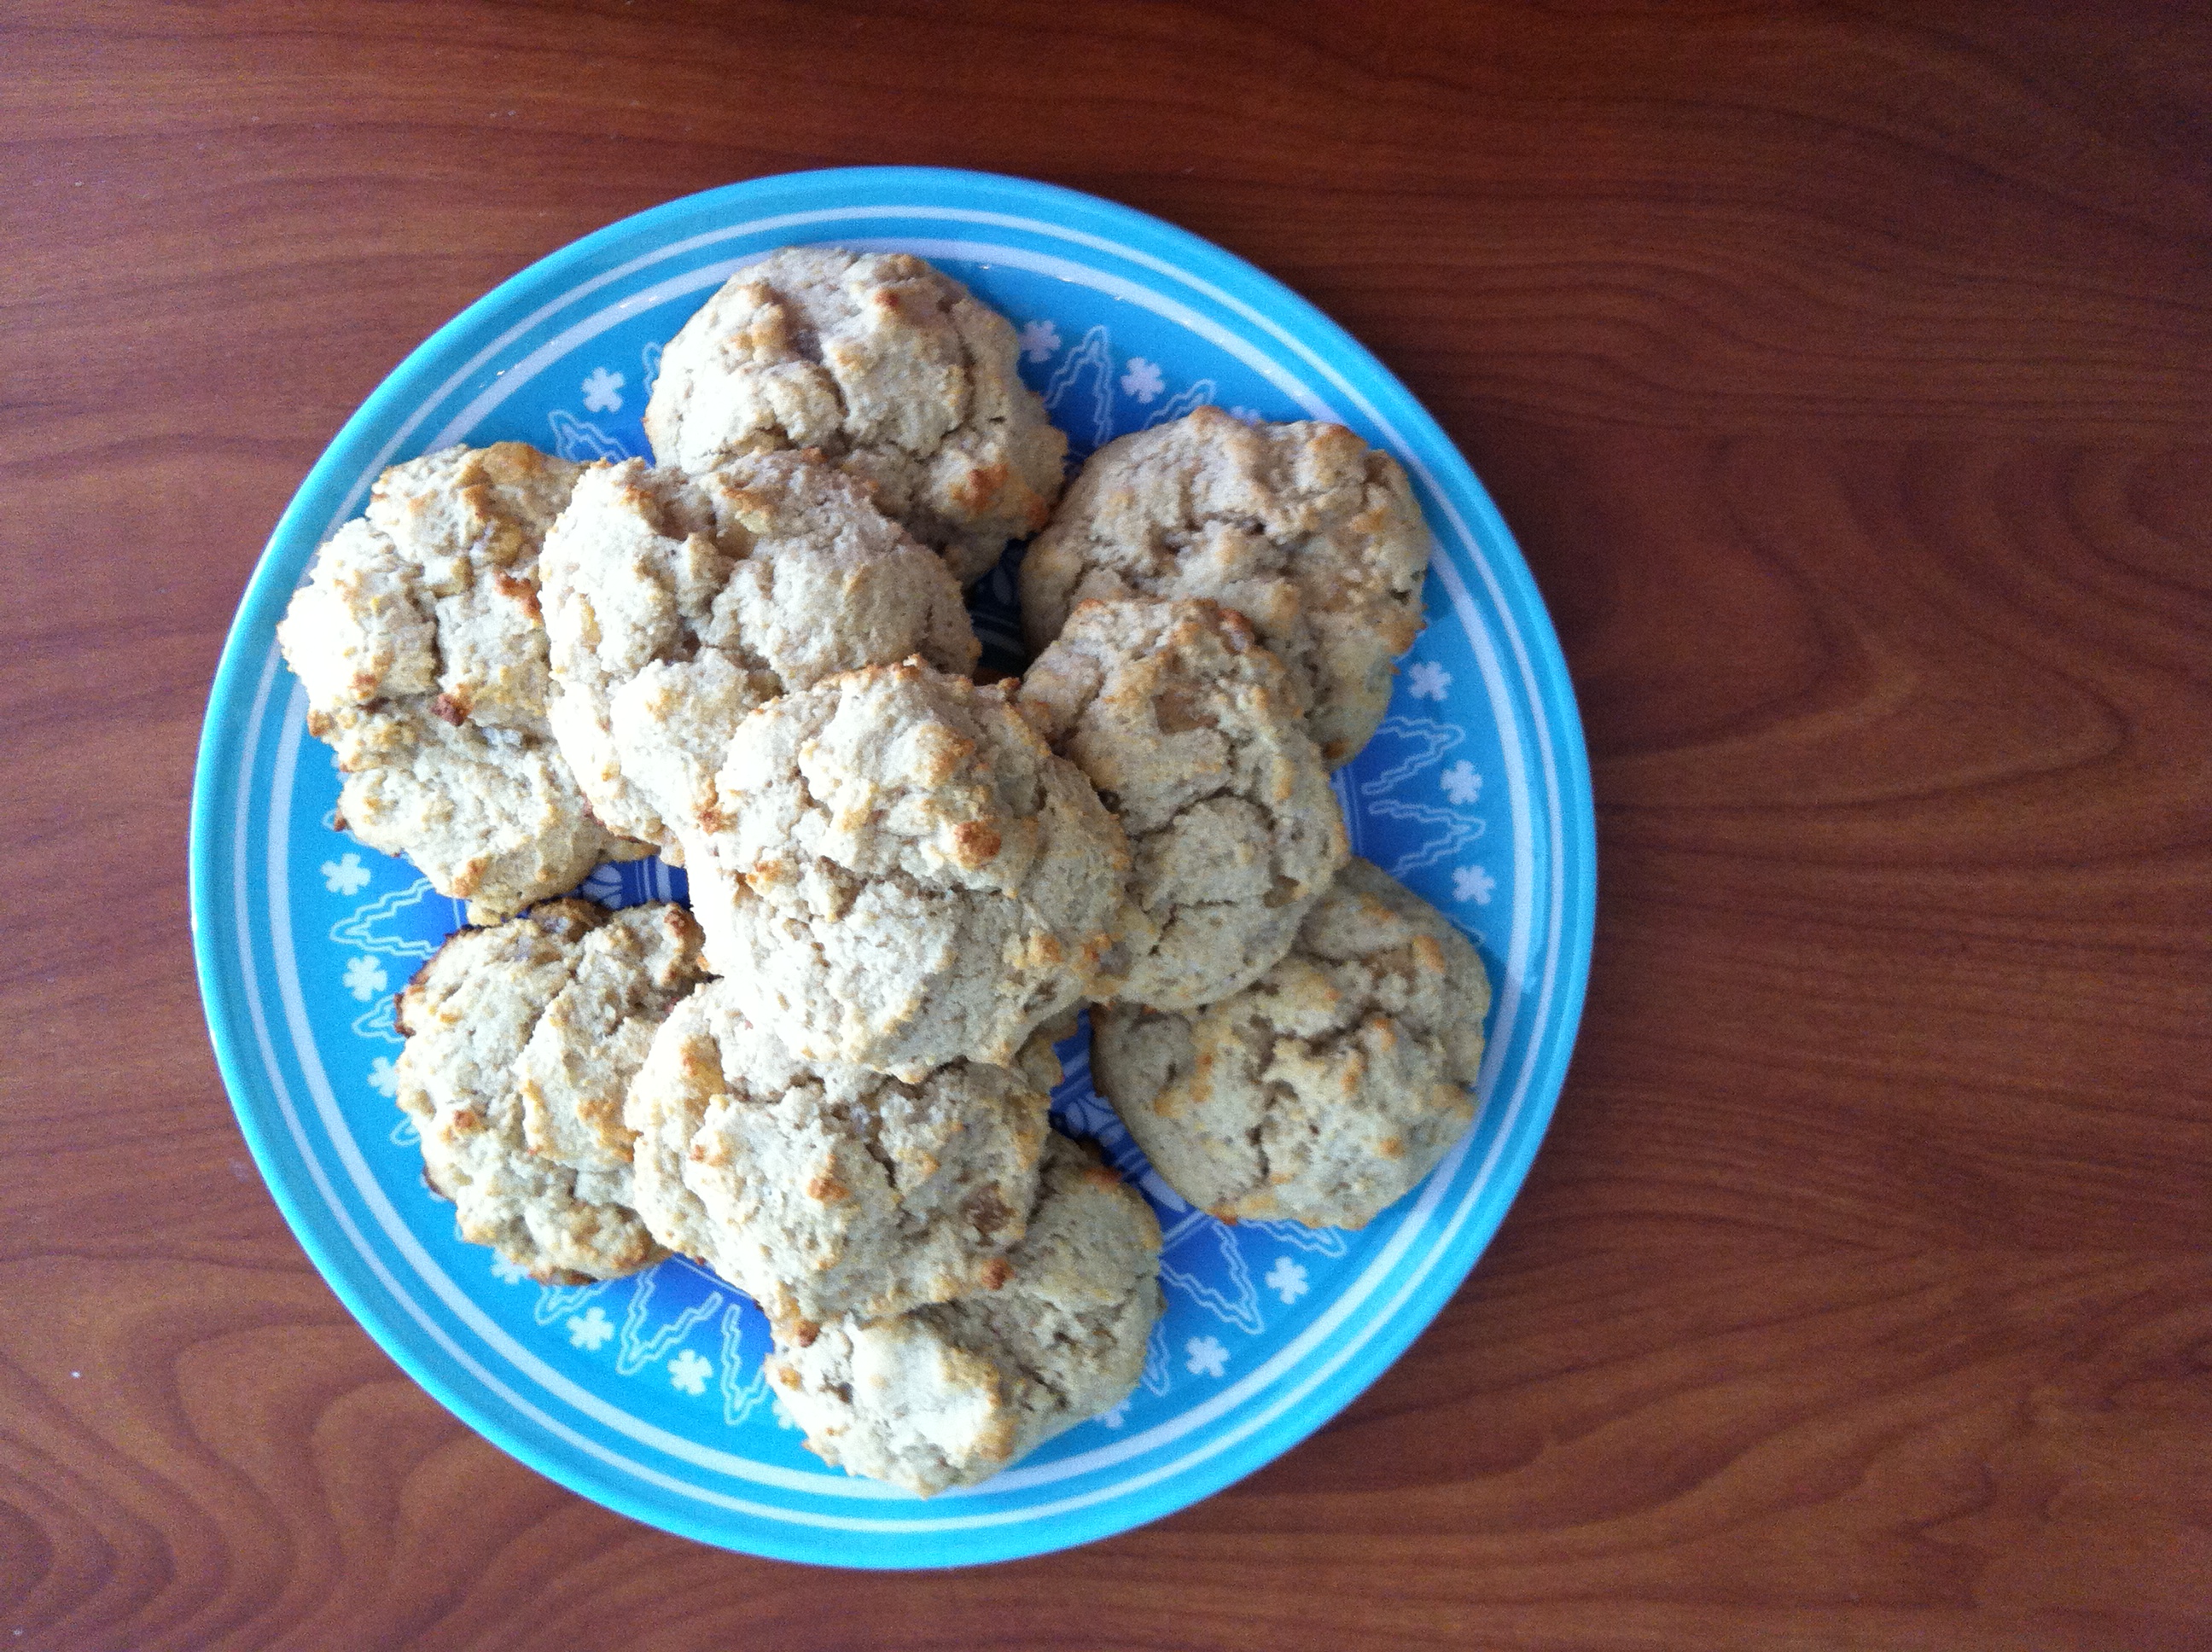
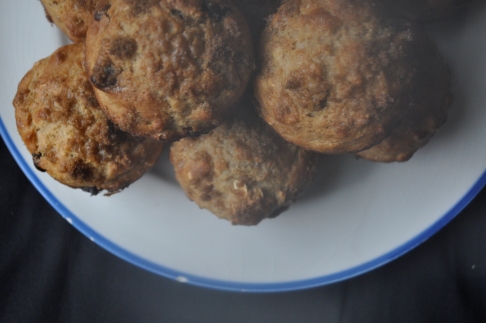
I am in looooove with these scooooones. If you don’t love scones, you’re wrong. Just kiddiiiing you’re entitled to your opinion and whatever (or am I kidding??) but just know that I strongly disagree. They’re crumbly, buttery perfection. Now I know that if you try to say you don’t like butter, you’re lying. Isn’t loving butter genetically engrained into every human or something? I feel like it is. I’m pretty sure. I also really, really love almonds. I would say a much larger than average percentage of my diet is composed of almond products and I’m very emotionally in touch with my almond-consumption. Trader Joe’s just restocked their almond butter and I almost cried tears of joy upon discovering this, for example. As long as we’re talking ingredients here, I’m also quite the honey fan. And can’t go wrong with oats. Essentially, these are my ideal Emily-scone. I got the idea for these from this lovely blog (how GREAT are her photos?!) with a few little tweaks here and there to the recipe. I loved the idea of toasting the oats before using them in the scones. This step can be skipped, of course, but I recommend it! The toasty flavor it adds is reeeally niiice.

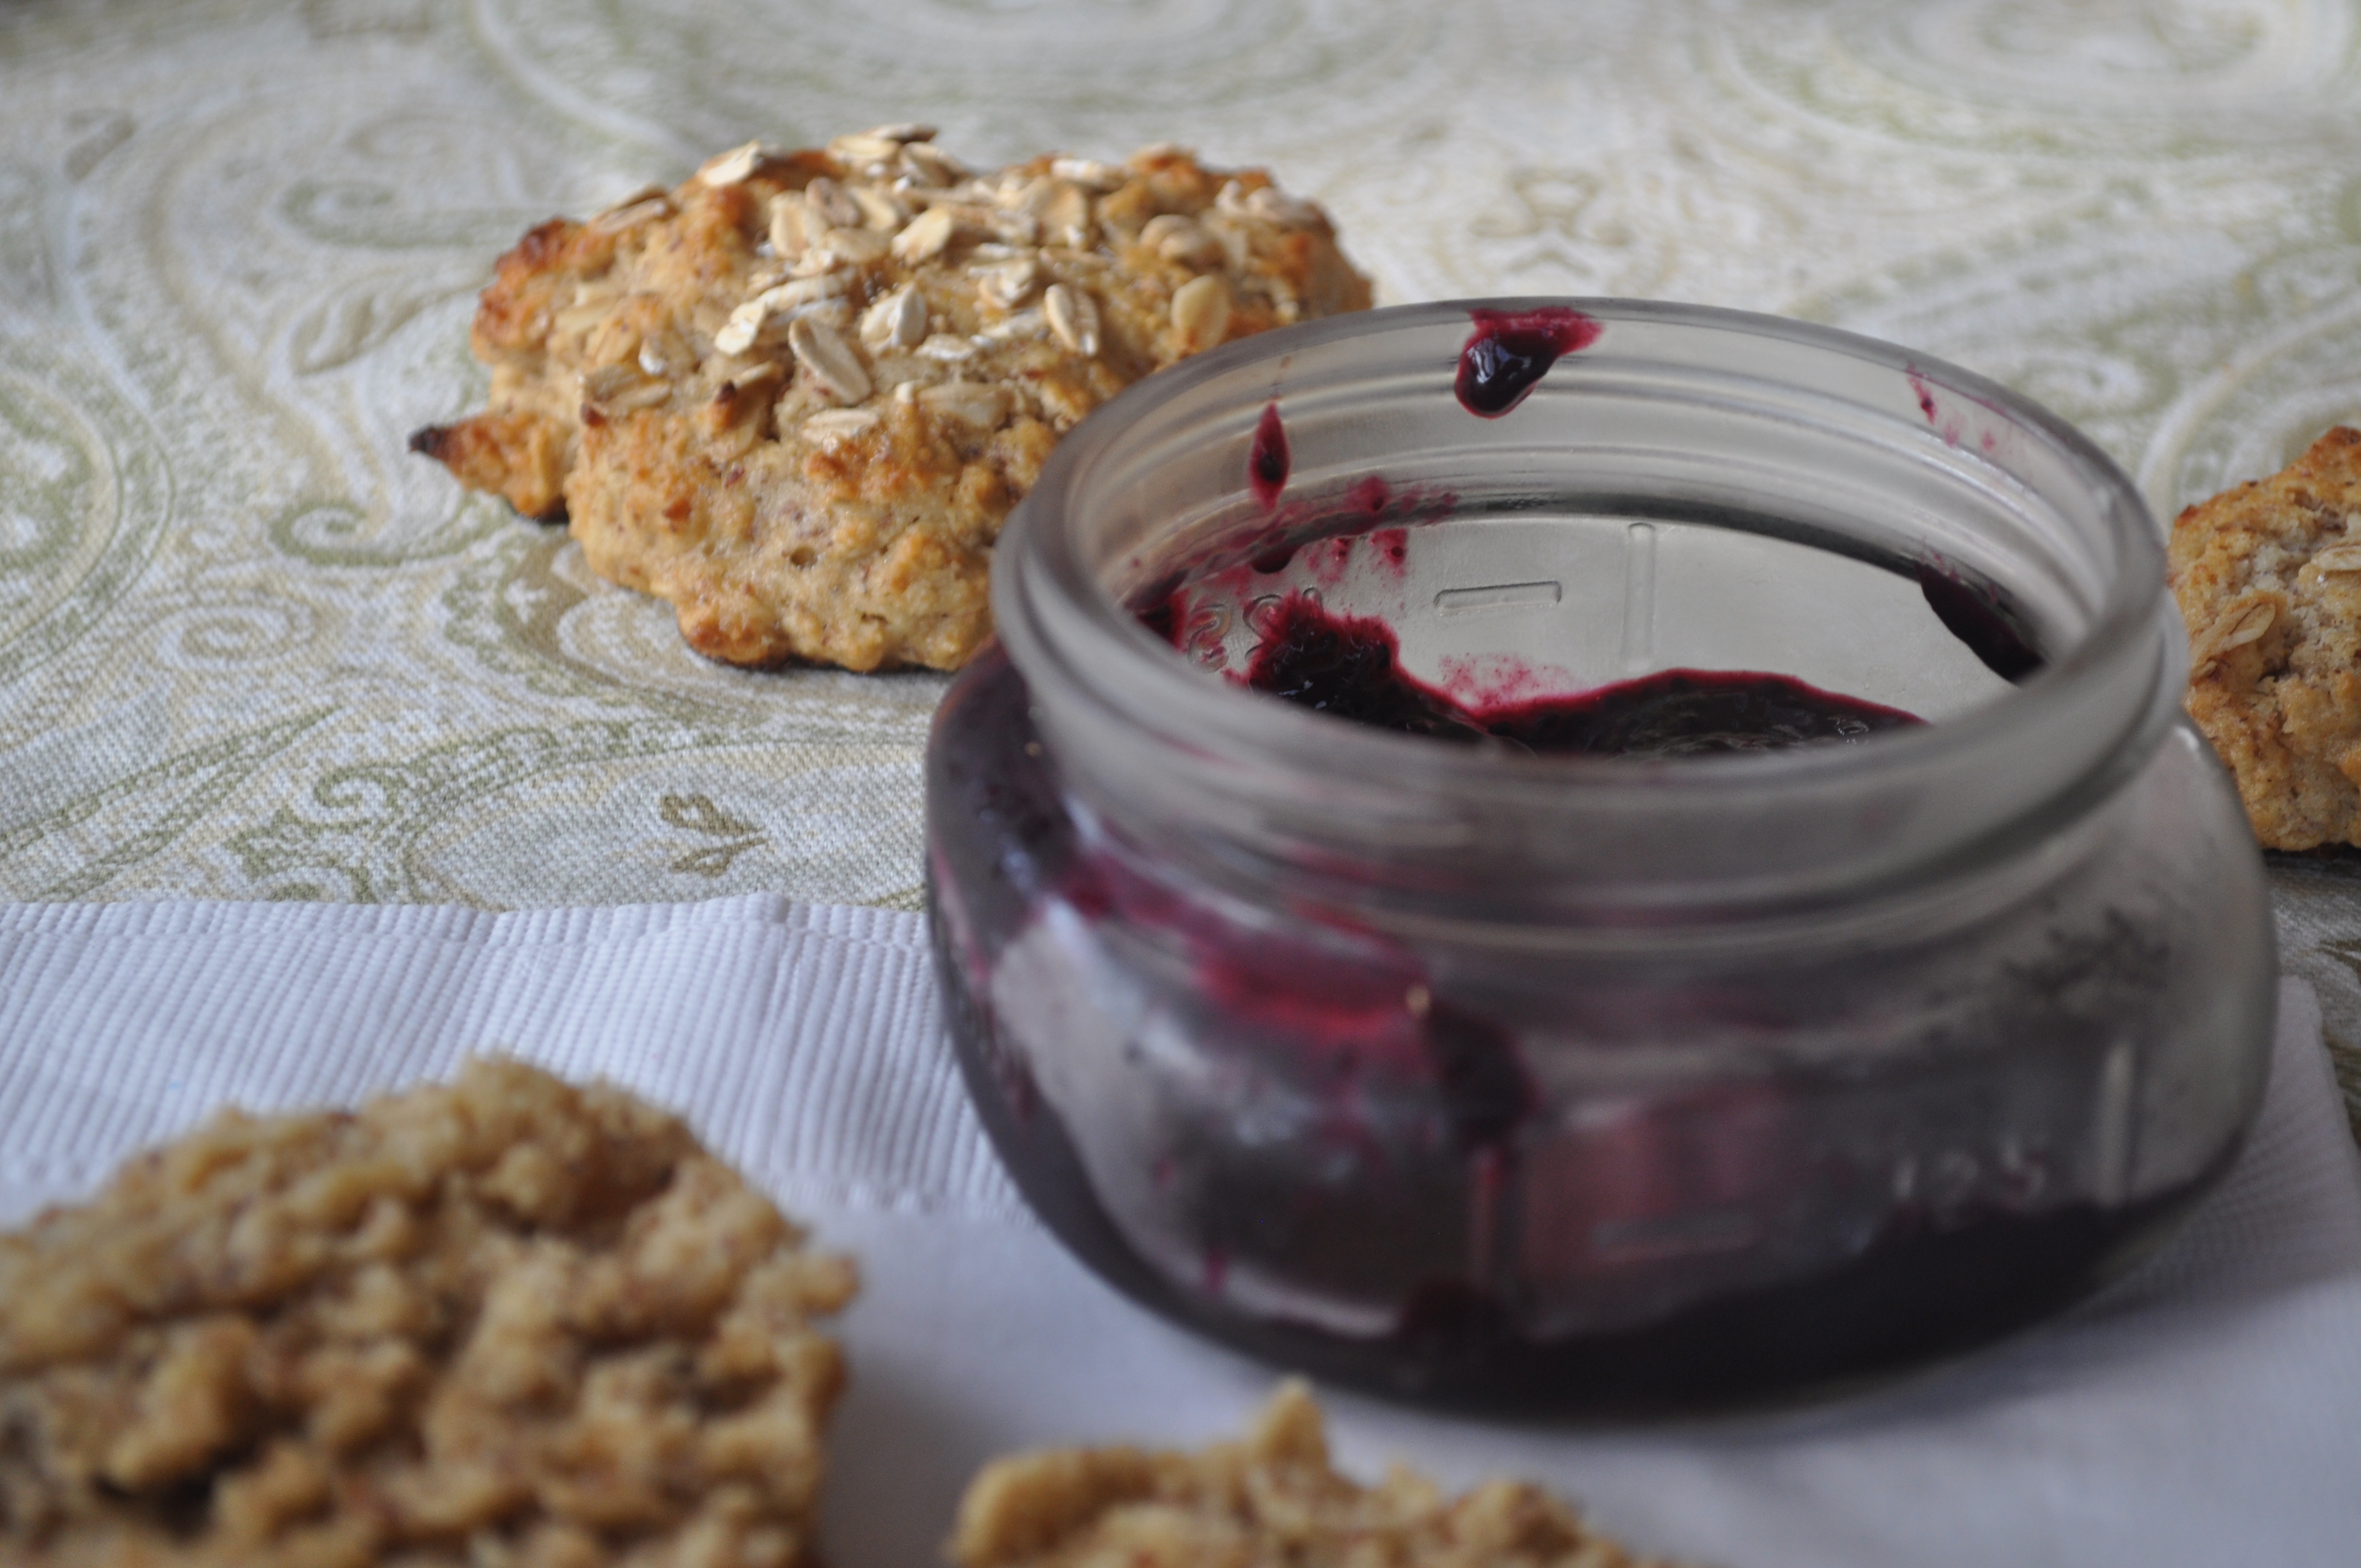
Also: if you’ve never made your own jam, I highly recommend it as well. Like. Right now. It’s summer! There are copious berries available! Go buy some and throw ’em on the stove! It’s so easy! This recipe truly is as “magical” as the title claims. So simple. And so, so delicious.

Scones:

1 1/2 c. old fashioned oats
3/4 c. almond meal
3/4 c. whole wheat flour
3 Tbsp. plain yogurt (I used whole milk, I imagine greek yogurt would work quite nicely as well)
1 Tbsp. milk
1/4 c. honey (+1/2 tsp. for the egg wash)
1 egg (+1 egg white for the egg wash)
2 tsp. baking powder
1/4 tsp. baking soda
1/2 tsp. salt
10 Tbsp. cold, unsalted butter, cut into small pieces

Start by preheating the oven to 375°. Spread your oats onto an ungreased baking sheet and toast them for about 7 minutes or until they’re fragrant. Take them out, let them cool, set aside 2 Tbsp. of them aside to put on top of your scones later, and increase the oven temperature to 450°. In a small bowl, whisk together the egg, yogurt, milk and honey and set aside. In a separate bowl, mix together the dry ingredients (the rest of the oats, almond meal, flour, baking powder, baking soda, and salt. Cut in the cold butter chunks (yeah, I hate the phrase “cold butter chunks” as much as you do, believe me) with a fork–or a pastry cutter, if you’re fancy–until almost all the way combined. You want the mixture to be mostly crumbly-looking; it’s okay if you can still see some butter pieces in there, just as long as they’re not too aggressively large. Make a well in the middle of the butter and dry-ingredient mixture and pour in the wet ingredients. Mix until juuust  combined. Don’t over-mix! Plop the dough out of the bowl onto a floured surface and form into a round, even 1″ layer. Using a pizza cutter (or a knife…but where’s the fun in that, hmm?), slice into 8 even, wedge-shaped pieces and space them out evenly onto a lightly greased baking sheet. In a teensy little bowl, whisk together an egg white and 1/2 tsp. of honey until combined and brush on top of each scone. Sprinkle them with your reserved oats and stick ’em in the oven for 8-10 minutes or until the edges turn that beautiful, light golden brown.

Image

Blueberry Chia Seed Jam:

3 c. blueberries (organic, please, berries are super pesticide-y)
3 Tbsp. honey
2 Tbsp. chia seeds
1/2 tsp. vanilla extract

In a medium saucepan, bring the berries and honey to a boil. Reduce the heat to medium-low and stir frequently for about 5 minutes. Using a potato masher, smush the berries until they’re a nice, jam-like consistency (but leave some berries intact for texture purposes!) and add the chia seeds. Keep stirring frequently and let the mixture continue to simmer until you get to a good consistency–about 15 minutes or so. It might seem a little runny, but keep in mind it’ll thicken up once it’s cooled down. Remove from heat, add vanilla, and let cool. Place it in a nice little jar, stick it in the fridge, and enjoy! See how easy that was? Seriously guys, you haven’t really tasted jam until you’ve had homemade. Unreal.

Image

Image

Shoutout to mah girl Emilie for talking to me repeatedly about scones and chia seed jam recently and therefore being the inspiration this scone-and-jam-making frenzy. Also to my lovely friend Joy for requesting the recipe, and therefore forcing me to actually post in a timely manner! All good things.

Hope your August is going swimmingly, friends.

Love, Emily


1 Comment

Maple Cinnamon Granola

Helloooo friends!

Image

Ohhhhh my god. Oh my god. Make this right now. This was my first time making my own granola and I don’t know what took me so long. My favorite muesli from Trader Joe’s was out of stock yesterday when I went grocery shopping and, although at first I was devastated, it made me realize I have a ton of perfect granola-making supplies in my cupboard and I should just do it myself! I need granola for finals. Need it. It’s my go-to “I don’t feel like preparing a real meal right now” meal that’s sufficiently healthy-ish (kinda) while still being snack-y. I promise you I will be on a granola-binge this week as a result of all the finals/move-out/end of the year stress that I will be experiencing. At least now I’m sufficiently prepared.

I just ate a bowl of this nutty, oat-y goodness with milk and sliced bananas and I’m fairly sure I will never be quite the same. This was SO EASY and it’s SO YUMMY and it made the apartment smell like cinnamon and maple syrup. I’m back on my breakfast binge, ladies and gentlemen. And I don’t even regret it. Yet.

3 c. old fashioned oats

1 c. coconut flakes

1/4 c. maple syrup

2 Tbsp. agave nectar (or honey!)

1/4 c. coconut oil

1 1/2 tsp. cinnamon

1/2 tsp. nutmeg

dash of salt

1 c. mixed nuts, chopped (I used cashews, peanuts, walnuts and pepitas)

1 c. dried fruit (I used mixed raisins)

Preheat the oven to 350. Line a baking sheet with tin foil and set aside. In a large bowl, mix everything but the dried fruit–but including the coconut, of course–until everything is sufficiently coated. (You may need to microwave the coconut oil for a few seconds to make it liquid-y.) Spread the mixture on your cookie sheet as evenly as possible. Stick it in the oven for 15-30 minutes (I do realize this is a big range, bear with me for a second), stirring every 5 minutes or so to make sure everything gets evenly toasted. Let it cool completely before stirring in your dried fruit and storing.

I only left my granola in the oven for about 20 minutes or so, but I’ve seen recipes say to leave it in for as long as 45. I checked mine every 5 and it seemed like the edges were nearing their toasty peak by the 3rd time I checked, so I re-stirred and took it out soon after. I’m sure a lot of it has to do with your oven–just don’t make this when you absolutely must be otherwise occupied since you’re going to have to check it. You definitely wouldn’t want your precious granola to burn.

This goes without saying, but you can obviously use whatever ingredients you’d like in your granola. If you don’t like coconut or something, omit it. If you’re really into dried cherries, add ’em. I bet you could make a really awesome banana-y granola using ripe mashed bananas. Or you could even add cocoa powder. Whatever you’d like, really! I’ll probably try more varieties and keep you posted.

For everyone who’s crazy busy right now: hang in there! You can do it! Make some granola, it’ll make you feel better.

Love, Emily


Leave a comment

Cinnamon Honey Ricotta Toast

Hi all,

Image

Okay this probably doesn’t warrant an entire “recipe” post but it was honestly so delicious I couldn’t help but share. It was the perfect pre-work breakfast. Quick and easy. Also, new and exciting! I always love a fried egg on toast (eggz 4ever*~), but it’s always nice to change things up every once in a while. This is a nice, sweet breakfast without being one of those “let’s put you in a sugar coma with obscene amounts of butter, powdered sugar and syrup!” kind of breakfasts.

The past couple days have been UTTER MADNESS. I am borderline out of food, so I’m relying more or less on breakfast foods and snacks for survival. I have to make it two more days before I replenish my grocery supply. I must survive! Yesterday for breakfast breakfast, I had these pieces of toast and a cup of coffee. For lunch breakfast, I had a granola bar and a gingerbread americano. Linner breakfast: a yogurt parfait. Dinner breakfast: a bowl of muesli and a banana. See? I wasn’t kidding. Breakfast for every meal. Plus there are those delicious scones that I made the other day that–although extremely delicious–add even more to my breakfast binge. My first non-breakfast type dish in literally 3 days was tonight when I finally broke the streak with chicken and broccoli (shoutout to Jade for providing the chicken, otherwise I would still be stuck in breakfastland). Don’t get me wrong, I LOVE breakfast foods. Adore them. They’re probably my absolute favorite, in fact. I never thought I would hear myself say this, but I really did get kind of sick of eating breakfast for every meal (gasp!). Really though! How many times can you eat eggs, yogurt, or some form of granola before it gets old? 72 hours is my limit, apparently.

1-2 slices of this fabulous wheat bread (or, store bought of course…less exciting though)

Ricotta

Honey

Cinnamon

Toast your toast (shocker), spread as much of ricotta as your heart desires on it, drizzle with honey, and sprinkle with cinnamon. Simple.

I bet this would be great with some slivered almonds sprinkled on top too. Oh, yum. I’ll probably do that tomorrow, in fact. Cannot wait for the morning.

Love, Emily


Leave a comment

Ginger Almond Scones

Hi friends,

Image

Happy Hump Day…….meh. I’m drowning in work/stressful things and I just want to ignore my responsibilities, bake, and eat these scones always. As I mentioned in my previous post, I have lots of baking things to use up before I leave and I had some ricotta in my fridge (but naturally, nothing to cook with…and no eggs…), so ricotta scones it was! These are delicious. They’re wonderfully moist (I hate this word but I had to, I’m sorry) while still retaining that great, crumbly scone texture. The almondy part of them comes from almond flour, which makes them healthier AND adds a nice nutty taste. I cannot wait to get home tonight and eat one with an ice cold glass of milk.

1 c. almond flour

1 c. whole wheat flour

1 tablespoon baking powder

1/4 c. sugar

1/2 teaspoon ground ginger

6 tablespoons cold unsalted butter, chopped into small pieces

3/4 c. part skim ricotta

1/3 c. milk

1/2 c. chopped crystallized ginger

Preheat your oven to 400 and prepare 2 baking sheets by greasing them with coconut oil/whatever you grease things with. Whisk together your dry ingredients (flours, baking powder, sugar, salt and ginger). Add the butter and mix together with your hands until combined into a coarse, meal-y consistency. Once combined, fold in the ricotta and the milk until smooth and eventually add the ginger. Don’t overmix! With a spoon, drop heaping tablespoon-sized portions onto your prepared cookie sheets–you should end up with about 12 scones, depending on what size spoonfuls you end up with. Bake for 12-15 minutes until the edges start to get lightly golden brown. Let them cool for a few minutes before transferring them elsewhere with a spatula. Enjoy!

Image

You may notice the bottoms of some of these scones are a little toasty. I took them out right at 12 minutes and this is how they turned out. They’re not bad; they don’t taste burnt or anything. But perhaps 350 for 15-18 minutes-ish would have been a better call. Not sure. If/when I make these again, I’ll be sure to update the recipe.

Mmmmm I love ginger. I quite enjoyed nibbling on little bits of crystallized ginger as I made these. Delicious.

Love, Emily


Leave a comment

Chocolate Almond Granola Bars

Hi everybody,

This is the first of a series of post-hurricane-catch-up posts that I’ll be writing–I did lots of cooking and baking while Sandy was happening, but was wifi-less for days (THE HORROR), hence my lack of posting. But I’m back! Lucky for me, we didn’t get hit too hard by the storm. A few power outages, fallen trees, and the loss of internet was all we really had to deal with. A huge part of downtown was not so lucky. Love you, New York. Stay safe.

This recipe was the result of a baking void build up from a few days–I needed to make something, but I didn’t want it to be unhealthy. All I did during the hurricane was wake up, eat, watch Law and Order SVU, eat more, shower more than necessary, eat, etc. We weren’t allowed to leave our homes, okay?! What else was I supposed to do? Anyways, after almost an entire week of constant eating (mostly those brownies in the last post), these granola bars were what I needed. They’re delicious, easy, and portable. And who doesn’t love granola bars? Warning: these are not super sweet. If you’re looking for a Chewy-bar-caliber sweetness, do not look here. The only thing I sweetened these with was banana; if you want something more, you could always add sugar or honey! Easy fix. I really wanted to make these a little more exciting by drizzling some melted chocolate over the top, but my chocolate chips mysteriously disappeared. I kid you not, I’m not even being sarcastic right now. They were in the cupboard last time I checked! Anyways, until I get more, these will have to do. Not the worst thing in the world! They were yummy either way.

2 ripe bananas, mashed

1/4 c. peanut butter

1/4 c. almond butter

1 1/2 Tbsp. cocoa powder

1 c. old fashioned oats

1/4 c. almond meal

1/2 c. chopped almonds

Preheat the oven to 350 and grease an 8×8″ pan. Put your bananas in a large bowl and mash with a fork (or your HANDS if you’re daring!) until as many lumps as possible are gone. You’re not going to be able to get all of them; don’t fret. Add your nut butters and mix until combined. Add your dry ingredients next and stir until everything is incorporated. Maybe add 1/2 c. or so of chocolate chips if you have them! Bake for 20 minutes or until the edges are lightly browned and the center is firm (but still gives a little). Wait until the bars cool completely before cutting! I cut mine into 10 granola-bar-sized bits. It worked out nicely.

Can you tell I love almonds? You could obviously add any other mix-ins you want to this, but I wanted to keep it a simple chocolate-almond combo. Dried fruit would be yummy, chocolate chips, coconut, etc. Go crazy. If you’ve never made your own granola bars before however (I hadn’t!), I highly recommend it! It’s honestly so simple. Aaaand cheaper. And so fresh! And there are no funky ingredients! And, last but not least: you can customize them. What’s better than that?

Enjoy!

Love, Emily


Leave a comment

Whole Wheat Chocolate Chip Oatmeal Muffins

Hi hi,

Image

So APPARENTLY there’s a gigantic storm a brewin’. Frankenstorm, if you will. So naturally, my first thought when faced with the harsh reality that we may not be able to leave our homes for three days straight was: I BETTER BAKE SOME THINGS ASAP. I planned on baking a bunch. I have perishables that could be baked into things, so why not use them while I still can, ya know? (There is also a chance that we might not lose power at all and that all of this baking will end up being a little unnecessary…but where’s the fun in that?) But seriously, guys! What am I supposed to eat if the power goes out and all our refrigerated things go bad? Well, muffins of course. And some brownies…but we’ll get to those later. All of my friends/roommates/their parents/my parents are freaking out about being safe in the storm and staying away from windows blah blah blah and my biggest concern is “what’s going to happen if all my food goes bad?! And WHAT AM I SUPPOSED TO DO IF THE POWER GOES OUT AND I CAN’T USE THE OVEN OR THE STOVE?” But really though. What on earth am I supposed to do. Looks like I’ll be living off of dry granola, almonds and room temperature soup for three days. It better not come to that. I will be heated.

My first order of business was to bake something that could kiiind of maybe pass as somewhat healthy, since we were going to be eating a lot of this for the next couple of days. Soooo muffins with chocolate chips? Of course. I loosely based this recipe on this one from allrecipes.com. These really aren’t that bad though! And they’re quite yummy. Just a pretty standard muffin, but it does the trick when a muffin craving strikes. Or as a hurricane survival snack, ya know.

1 1/4 c. old fashioned oats

1 c. milk

3/4 c. plain greek yogurt

1 egg

3/4 c. brown sugar (separated into 1/2 c. and 1/4 c. portions)

3/4 c. semisweet chocolate chips

1 1/4 c. whole wheat flour

4 tsp. baking powder

1/2 tsp. salt

Combine the milk and oats and set aside to sit for a little. Preheat the oven to 400 and grease/line a muffin tin. Add the egg, yogurt, and 1/2 c. of your brown sugar and mix until combined. In a separate bowl, combine your dry ingredients (flour, baking powder and salt) and combine the two mixtures together until juuust incorporated. Fill your muffin tin with the batter and sprinkle the remaining brown sugar on top. I made exactly 12 (rather full and round, but not too full) beautiful muffins. Bake for 18-25 minutes depending on your oven; the original recipe said 20-25 but at 20 minutes mine were already the teensiest bit toasty so I’d recommend you check them a little early!

Image

Stay safe, east coast buddies! Stay tuned for my hurricane brownies recipe. Let me tell you, it’s a good one.

Love, Emily


1 Comment

No-Knead White Bread

Hi friends,

I made bread! No-knead bread. So no knead for stress. No kneading. Ha. Ha ha. I am so not funny, I’m sorry. (That was for you, Armen.)

Anyways: I don’t think you understand how proud of I was of this lovely loaf. I’m a complete bread-making newbie. I have never in my entire life made my own bread before, and I was so excited to see this come out of the oven. Oh my goodness it was SO PRETTY and smelled SO GOOD and it was SO EASY. Sooooo easy. As in, foolproof, first-time-bread-making-success kind of easy.

I found this recipe here for what promised to be super easy, low maintenance bread and it was exactly that. I barely did anything! Basically all my friends thought it was hilarious that I made a loaf of bread. Most people that encountered it flat out refused to believe that I made it myself. I got a lot of “you did not make that loaf of bread” and “what kind of college student makes their own BREAD?” comments. Whatever, guys, it’s delicious and easy and super cheap. I’d recommend you do the same, in fact. Sheesh. What college student doesn’t love delicious, fresh bread (helloooo, toast is such a 20-something food staple, am I right) as well as bragging rights that you make your own? I’ll definitely make this a lot. Maaaybe weekly. Although this is ambitious, I’m kind of looking to replace buying bread; this is way better. And way cheaper. The only special thing you have to get is yeast which is less than a dollar for a few packets sooooo no excuses. I was a little stressed out by the fact that I don’t have a cast-iron pot (haaa I wish) but I used the big ceramic insert thing from the crock pot and it worked fabulously. I’m sure you could use a big pot with a lid as well, as long as it doesn’t have any plastic or anything on it that would melt. Try it, you won’t be disappointed!

3 cups all-purpose flour

1 3/4 tsp. salt

1/2 tsp. yeast

1 1/2 c. water

(Yes, that’s really, truly all you need. I  kid you not.)

In a large bowl (emphasis on large–it needs room to rise), mix together the flour, salt and yeast. Then add water and stir until the mixture is combined and doughy. Do this in the evening, cover the bowl with plastic wrap and let it sit overnight (at least 12 hours) for the dough to rise. When you’re ready to bake your bread, preheat the oven to 450. Once the oven is hot, put your pot and lid in to preheat that as well for at least 30 minutes. While the pot is heating, dump the dough out of the bowl onto a heavily floured surface. Flour your hands (the dough is suuuper sticky, beware), shape the dough into a ball, and cover with the plastic wrap you used to cover the bowl until your half hour is up. Carefully remove the pot from the oven and drop the dough inside, covering and baking for 30 minutes. Take the lid off (again, carefully–450 degrees is hot) and bake for another 15 minutes. You may take this opportunity to get a good first look at your beautiful bread-to-be. Gorgeous, isn’t it? Don’t be stressed if it looks to you like it’s done at this point; I thought if I left it in for another 15 minutes it would burn but I bit my tongue and followed directions and it turned it great. See? I know nothing about baking bread and it still turned out great. After that final 15 minutes, remove it from the oven and put your amazing bread on a cooling rack.

Breathe in the incredible smell of freshly-baked bread, pat yourself on the back, and take some pictures of your masterpiece with your camera and its regrettably shattered lens. And then instagram it and add to your 32897 other food related instagrams, probably annoying the vast majority of your followers. Or at least, that’s what I did.

Love, Emily


1 Comment

Pumpkin Appreciation Post

OKAY HI GUYS.

Hi. It’s been a while. My camera lens shattered–hence the weird blur thing I’ve got going on in the pictures, I’ve been a busy busy girl, etc. Anyways: IT’S FAAAALL, EVERYONE. I absolutely adore fall. I am such a southern California baby; any sort of weather change makes me SO EXCITED. Especially when it involves beautifully colored leaves! And big comfy sweaters! And boots, and tights, and thick socks, and tea, and apples, and crisp autumn air, and scarves, and pumpkin flavored things. I repeat. Pumpkin flavored things. What’s not to love? Come October, I search the city of New York high and low for the best pumpkin themed treats and products (FYI New Yorkers: Stand Burger on E 12th and University has FABULOUS pumpkin milkshakes, and the pumpkin scone that I’ve tried so far is definitely at Alice’s Tea Cup) and I’d say I’ve done a pretty good job with my findings.

By that, I mean that I have been going pumpkin crazy. Literally though. I think my roommates are starting to get a little annoyed by my compulsive need to purchase any product with the word “pumpkin” in it. For example, I have recently eaten/have recently made/currently have in my pantry or fridge:

-pumpkin spice coffee
-pumpkin spice rooibos tea
-pumpkin pancake mix
-pumpkin bread mix
-3 cans organic pumpkin puree
-pumpkin chocolate chunk bars–my favorite (recipe to follow)
-pumpkin spice simple syrup, for coffee! (recipe to follow)
-pumpkin spice oatmeal (recipe to follow)
-pumpkin pie smoothie (recipe to follow)

Now that I actually look at a list it does seem rather excessive…whatever. Sue me. I’m just a girl who loves pumpkin more than anything, that’s all.

Pumpkin Chocolate Chunk Bars:

Image

You’ll note that this picture was taken towards the end of the life of this batch of pumpkin bars…they go fast. I made this yesterday, so the fact that a 9×13″ pan of them are already in this state is saying something. Apologies for the terrible quality of the photo, the camera lens issue plus the state of the pumpkin bars when I actually got around to photographing them was not idea, but oh well. These pumpkin bars are my absolute favorite pumpkin dessert to make for my family when I go home in the fall/winter. They are much appreciated by my dad and brother especially. I really, strongly believe that you will love them just as much!

2 c. flour

1 Tbsp cinnamon

1/2 tsp. nutmeg

1/2 tsp. ground ginger

1/2 tsp. ground cloves (if you have it! I omitted)

1 tsp. baking soda

3/4 tsp. salt

1 c. (2 sticks) unsalted butter, room temperature

1 1/4 c. sugar

1 large egg, room temperature

2 tsp. vanilla

1 c. pumpkin puree

12 oz. semisweet chocolate chunks (or chips, but preferably chunks)

Preheat the oven to 350. Grease a 9×13″ pan and set it aside. In a small bowl, mix together the dry ingredients (flour, spices, baking soda, and salt) and set this aside. In a large bowl, cream together the butter and sugar until fully combined, then add in the egg and vanilla it all together. Next, add the pumpkin puree to your butter and sugar mixture and mix well. This will look a little curdled and funky; you didn’t do anything wrong! It’ll all come together in the next step: gradually mix in the dry ingredients to the large bowl a little bit at a time, stirring constantly. Once completely combined, dump that entire bag of chocolate into the batter, mix, and pour into your prepared pan. Bake for 30-35 minutes (mine took the full 35, plus even a couple extra for the middle to set) until a toothpick inserted in the center comes out clean. Voila! There ya go.

Prepare for these to be eaten very quickly; they’re pretty wonderful.

Pumpkin Spice Syrup:

Image

See that mason jar of gritty-looking, thick, brown liquid? Yep, that’s what you’re making! I understand it looks highly questionable, but let me tell you. It is delicious. I adapted this recipe from this one for a pumpkin spice latte, but since I do not have an espresso machine (I wish), I just pour it in my coffee and it does the trick just the same! It’s my own version of the obscenely expensive–but equally addicting–Starbucks pumpkin spice latte. It certainly does the trick!

1 c. water

3/4 c. sugar

1 1/2 Tbsp. pumpkin puree

2 tsp. cinnamon

1/2 tsp. nutmeg

1/4 tsp. ginger

Combine all of the ingredients in a medium saucepan over medium-low heat, stirring every once in a while. Do so for about 10-15 minutes; it should thicken a little but it will do most of the thickening once you take it off the stove. Once it has cooled enough, you can strain it if you’d like to get rid of some of the gritty situation caused by the spices that will inevitably settle to the bottom, but you don’t have to! I don’t mind the spices, nor do I have a strainer or cheesecloth on hand, so I just stuck it in a mason jar in the fridge and called it a day.

Pumpkin Spice Oatmeal:

Sorry guys, no picture! This was just done on a whim since I had extra pumpkin puree that I needed to use (as was the pumpkin pie smoothie). It’s a super simple recipe. You could probably figure this out for yourself, but here ya go anyways

1/4 c. cooked steel cut oats

2 Tbsp. pumpkin puree

1 Tbsp. brown sugar

Cinnamon, Nutmeg, and Ginger to taste

Mkay guys, all you have to do is mix this all together. Maybe add some dried cranberries or whatever else you like (I did that plus some walnuts, it was delicious).

Pumpkin Pie Smoothie:

Also no picture for this one. Apologies. This was DELICIOUS. I am absolutely in love with my banana smoothies, so this pumpkin version nearly killed me. In a good way. Death by pumpkin deliciousness.

1 frozen banana, broken up into pieces

1 scoop whey protein powder

2 Tbsp. pumpkin puree

2 Tbsp. old fashioned oats

Cinnamon, nutmeg, and ginger to taste

1 c. milk

Ice (optional)

Blend this all together, and there ya go! The oats add a nice “pie crust” kind of taste; and honestly this is just all around delicious. I want one right now, but I don’t have an open can of pumpkin puree (blasphemy!). I can imagine blending some dark chocolate chips into it would make it a pretty fabulous healthy dessert…think about it…

For all of you who do not understand what the “big deal is” with all this pumpkin stuff: shame on you. Pumpkin is magical and wonderful in every way. It is the epitome of FALL FLAVOR. I will definitely be making more pumpkin things soon (pumpkin snickerdoodles have been on my radar recently, along with my eventual pumpkin apple crumb pie eventually for my Thanksgiving masterpiece), so pumpkin fans, stay tuned. It’s going to be a great fall for food.

Love, Emily


Leave a comment

Pear Scones

Hi loves,

Image

Mmmmmkay. After these, I am done with baking with diced fruit for a while. Do you guys have any idea how time consuming/irritating it is to peel apples or pears without a peeler? I did it by hand! With a knife! Not that I had anything else to do. So it was fine, I was just so over it by the time I finished. But it was absolutely worth it. Baking on a college budget/in a tiny apartment is always rather challenging, but I make do. I don’t know what I would do without baking, seeing as it is the only thing keeping me at least somewhat mentally stable at the moment. Peace, love and scones 4ever.

I was home alone and in a funk this morning that only baking could cure (as usual). Aaaand I was in the mood for scones. And I recently bought pears. So pear scones it was! My morning was spent blasting the new Band of Horses and Grizzly Bear albums at an obnoxious volume, drinking iced coffee, and baking/dancing around with no pants on. Pretty standard morning for me, to be honest. Hey, it made me feel better, so why not? I just used my version of my delicious go-to, basic scone recipe (this one for cardamom ginger scones–which are DELICIOUS by the way–minus the cardamom and ginger of course) and tweaked it a little to make these delicious bits of scone goodness. As usual, I halved the recipe (2 dozen scones for the 4 people living in this apartment would have been a bit much), but I’ll post the full one for all of you lovelies.

3 1/3 c. all purpose flour

1 tablespoon + 1 tsp. baking powder

1/2 tsp. salt

1 tsp. cinnamon

1/3 c. unsweetened applesauce

1/2 c. unsalted butter, cut into 1/2″ pieces

1 c. cold milk

1 egg

1 large pear, peeled and diced

Egg wash:
1 egg

4 tablespoons brown sugar

Preheat the oven to 400. Grease a baking sheet and set aside. In a large bowl, mix together flour, baking powder, salt, and cinnamon. Add butter, milk, an egg, and your applesauce and mix together until just combined. Don’t worry if your butter isn’t all the way mixed in–it’s okay if there are still some little chunks. Don’t overmix it! Once ingredients are sufficiently combined, fold in your pear pieces. Place very heaping tablespoons of dough on your greased baking sheet a few inches apart, whisk together your brown sugar and the other egg, and glaze each scone with the mixture. Bake for 15-18 minutes or until the edges are golden brown; mine took about 16 minutes. Don’t bake them for too long or they’ll dry out and won’t be nearly as delicious!

ImageImage

As usual, I always recommend you eat one warm. Prooobably with a glass of milk. I may or may not have already eaten two of these. No regrets, just scones.

Wishing all of my New York fwiends a nice, cozy thunderstorm day!

Love, Emily


2 Comments

Apple Cinnamon Muffins

Hey babes,

Image

So I just had a conversation that went a little something like this:

Me: Want a muffin? They’re waaaarm
Roommate: They smell heavenly but I’m so full. I don’t know if I can do it.
Me: (takes a bite of a muffin)
Roommate: (looks distressed)
Me: Maybe just a bite of my muffin?
Roomate: Mhmmmmmm
Me: (feeds her bite of muffin)
Roommate: OH MY GOOOOD WHY IS EVERYTHING YOU BAKE SO GOOD I THINK I JUST TASTED HEAVEN I need to eat a whole one oh my god (etc. etc.)

I kid you not. This seems to happen a lot with my baking. My roomies are the most lovely little culinary-confidence boosters. I love ’em. Anywaaaaays. Okay, I’m not trying to brag, but these were some pretty awesome muffins. I adapted the recipe from Smitten Kitchen who adapted it from some other recipe (King Arthur Flour?)..lots of adapting. Regardless, these muffins turned out wonderfully! Mine are not, however, whole wheat. Being a college student with limited baking resources, I do not own whole wheat flour. Maybe someday. If I’m feeling ambitious. Also I did not have buttermilk OR plain yogurt. But I made do just fine. And they turned out FAB soooo yay try my version!

2 c. all purpose flour

1 tsp. baking powder

1 tsp. baking soda

1/4 tsp. salt

1 Tbsp. cinnamon

1/2 c. unsalted butter, room temp.

1/2 c. sugar

1/4 c. dark brown sugar (plus some extra to sprinkle on top!)

1 c. vanilla greek yogurt

2 apples, peeled and chopped (I used one pink lady and one granny smith…ha)

Preheat the oven to 450. Mix together the flour, baking soda, baking powder, salt, and cinnamon in a bowl and set aside. Cream together the butter, sugar and brown sugar in a separate bowl until combined and fluffy, then add the egg and mix again. Next, gently mix in the yogurt until just combined. Finally, fold in the apple chunks (ugh I had the word CHUNK but it had to be said) and divide the batter into a greased muffin pan (again, I used my go-to coconut oil) and sprinkle some brown sugar on of each muffin so they turn out nice and crunchy and yummy. Bake for 10 minutes, turn the oven down to 400, and bake for another 5-10 until a toothpick comes out clean. Mine only needed an extra five, and even then they were a little crispy. I probably could’ve taken them out sooner, but they were fiiine.

The batter may seem super thick, but don’t worry! Mine certainly was. I blame the greek yogurt. But it made the muffins super moist and perfect so I’m okay with it. The original recipe said this made a dozen muffins, Smitten Kitchen said 18, and I ended up making 16 soooo I guess it really depends on your batch!

Image

I’m so glad I decided to buy a muffin pan immediately upon moving into my apartment. Solid investment.

Love, Emily